AstroでOGP画像を動的に生成する
氷使って効率化。DE-TEIUです。 久々にこのブログをちょっとカスタマイズしました。
何したの
このブログの各記事のURLをSNSに貼った時に表示される、OGP画像を変えました。 今までは海苔のイラストが表示されるだけでしたが、現在はこのように、画像に記事のタイトルが埋め込まれるようになっています。
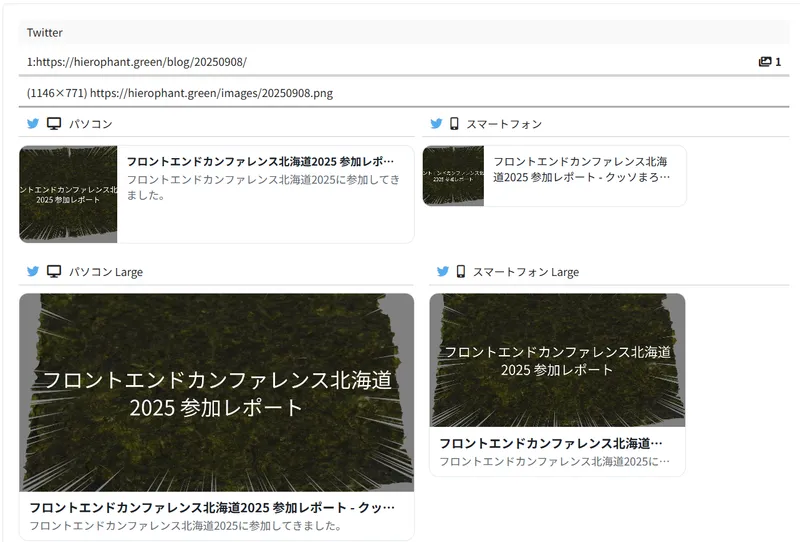
(※ラッコツールズ様の「OGP確認」を使用して確認したものを貼っています。これ大変便利ですよね)
どうやったの
やったことは、ざっくりまとめると以下の2つです。
- Astroの動的ルーティング機能を使って、各記事に対応する画像のルーティングを定義する
- ビルド時に、定義したURLが呼ばれたらcanvasで画像を作って返すようにする
ちなみにこのブログで使用しているAstroのバージョンは5.1.1です。
画像を返すルーティングを定義
まずはこんなファイルを用意します。
/src/pages/images/[slug].png.tsで、こいつの中身には、とりあえず「適当な画像を読み込んでそのデータを返す」処理を実装。
import type { APIContext } from "astro";
import { getCollection } from "astro:content";
import fs from "node:fs";
import path from "node:path";

/**
 * 各ブログ記事に対応するOGP画像のパスを定義
 * (※"/images/[slug].png"の形式で各記事のOGP画像URLを提供)
 */
export async function getStaticPaths() {
  const posts = await getCollection("blog");
  const result = posts.map((post) => ({
    params: { slug: post.id },
    props: post,
  }));
  return result;
}

/**
 * OGP画像データを返すエンドポイント
 */
export async function GET({ params, props }: APIContext) {
  //publicフォルダに入っているogpimage.pngを読み込んで、そのデータをpngとして返す
  const imageFileName = "ogpimage.png";
  const imagePath = path.join(process.cwd(), "public", imageFileName);
  const imageBuffer = fs.readFileSync(imagePath);

  return new Response(imageBuffer as BodyInit, {
    headers: {
      "Content-Type": "image/png",
      "Cache-Control": "no-cache",
    },
  });
}
この時点で試しにローカルサーバーで実行してみます。そしてブラウザからローカルサーバーの “/images/20251214.png” にアクセスすると”ogpimage.png”の画像が表示されます。成功。
(※20251214.pngのところを、記事が存在する他の日付に変えても同様)
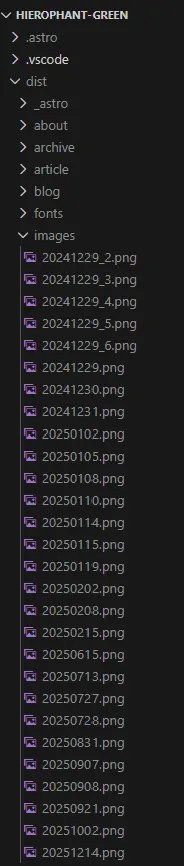
また、ビルドすると、“dist/images/“以下に日付ごとの画像が生成されていることもわかります。
(…これ月ごとにフォルダ分けたほうがいい気がしてきた)
canvasで画像を動的に作る
これで「画像を返す」ルーティングは作れました。次は「canvasで画像を生成し、それを返す」ようにしてみます。
事前準備として、ビルド時にNode.jsからcanvasを使えるようにするために、node-canvasを導入しておきます。
canvasを作る
[slug].png.tsに以下の処理を実装していきます。
/**
 * OGP用の画像をcanvasで生成
 * @param imagePath canvasに埋め込む元画像のパス
 * @param articleTitle 記事タイトル
 * @returns canvas
 */
async function generateCanvas(imagePath: string, articleTitle: string) {
  // 画像を読み込み
  const image = await loadImage(imagePath);

  // キャンバスを作成(画像と同じサイズ)
  const canvas: Canvas = createCanvas(image.width, image.height);
  const ctx: CanvasRenderingContext2D = canvas.getContext("2d");

  // キャンバスに画像を描画
  ctx.drawImage(image, 0, 0);

  // 黒い半透明の四角を全体に描画
  ctx.fillStyle = "rgba(0, 0, 0, 0.5)";
  ctx.fillRect(0, 0, canvas.width, canvas.height);

  // テキストスタイルを設定
  ctx.font = "60px";
  ctx.fillStyle = "#FFFFFF";
  ctx.textAlign = "center";
  ctx.textBaseline = "middle";

  // タイトルを改行処理(後述)
  const maxWidth = canvas.width * 0.9; // 画像幅の90%
  const lines = wrapText(ctx, articleTitle, maxWidth);
  const lineHeight = 80; // 行の高さ

  // 複数行のテキストを中央に描画
  const centerX = canvas.width / 2;
  const centerY = canvas.height / 2;
  const totalHeight = lines.length * lineHeight;
  const startY = centerY - totalHeight / 2 + lineHeight / 2;

  lines.forEach((line, index) => {
    const y = startY + index * lineHeight;
    ctx.fillText(line, centerX, y);
  });

  return canvas;
}
記事タイトルが長かったら改行して表示したい
そういう処理も必要ですね。用意しておきましょう。
/**
 * テキストを指定した最大幅で改行する
 * @param ctx canvasのContext
 * @param text テキスト
 * @param maxWidth 最大幅
 * @returns 最大幅を超えないように改行したテキスト
 */
function wrapText(
  ctx: CanvasRenderingContext2D,
  text: string,
  maxWidth: number
): string[] {
  const lines: string[] = [];
  let currentLine = "";

  for (let i = 0; i < text.length; i++) {
    const testLine = currentLine + text[i];
    const metrics = ctx.measureText(testLine);

    if (metrics.width > maxWidth && currentLine.length > 0) {
      lines.push(currentLine);
      currentLine = text[i];
    } else {
      currentLine = testLine;
    }
  }

  if (currentLine.length > 0) {
    lines.push(currentLine);
  }

  return lines;
}
ここもうちょっと簡潔に書けそうだけど、まぁ一旦これで。
フォントを変えたい
node-canvasのregisterFontを使うと、canvasに文字を出力する時に、自分が用意したフォントを使えるようになります。 今回はGoogle FontsのNoto Sans Japaneseを使いました。 ダウンロードして”/src/resources/NotoSansJP-Regular.ttf” に置いときましょう。
/**
 * 日本語フォントを登録
 */
function prepareFont() {
  const fontPath = path.join(
    process.cwd(),
    "src",
    "resources",
    "NotoSansJP-Regular.ttf"
  );
  registerFont(fontPath, { family: "Noto Sans JP" });
}
で、generateCanvas関数のテキスト出力のところをこうすればフォントを変えられます。
ctx.font = "60px 'Noto Sans JP'"; // ここにフォント名を書いた

ctx.fillStyle = "#FFFFFF";
ctx.textAlign = "center";
ctx.textBaseline = "middle";
エンドポイントの実装を変更
あとは上記の処理を呼び出してcanvasを生成し、それをpngとして返すようにしましょう。 これで完成。
/**
 * OGP画像データを返すエンドポイント
 * @returns png画像データ
 */
export async function GET({ params, props }: APIContext) {
  const imageFileName = "nori-line.png";
  const imagePath = path.join(process.cwd(), "src", "resources", imageFileName);

  const articleTitle = props.data.title;

  // 使用するフォントを準備
  prepareFont();
  // 表示する画像と記事タイトルを埋め込んだキャンバスを生成
  const canvas = await generateCanvas(imagePath, articleTitle);
  // キャンバスからPNGバイナリデータを生成
  const imageBuffer = canvas.toBuffer("image/png");

  return new Response(imageBuffer as BodyInit, {
    headers: {
      "Content-Type": "image/png",
      "Cache-Control": "no-cache",
    },
  });
}
やってみた感想
わりとすんなり行きました。作業時間は画像の用意とかも含めて3時間ぐらいだった気がする。
ちなみに、Satoriという、HTML+CSSをSVGに変換するライブラリを使って、動的に画像を生成する方法もあるようです。 個人的にはCanvasを使うのが好きなので、今回はSatoriを使わずにやりました。